 Tłumacz
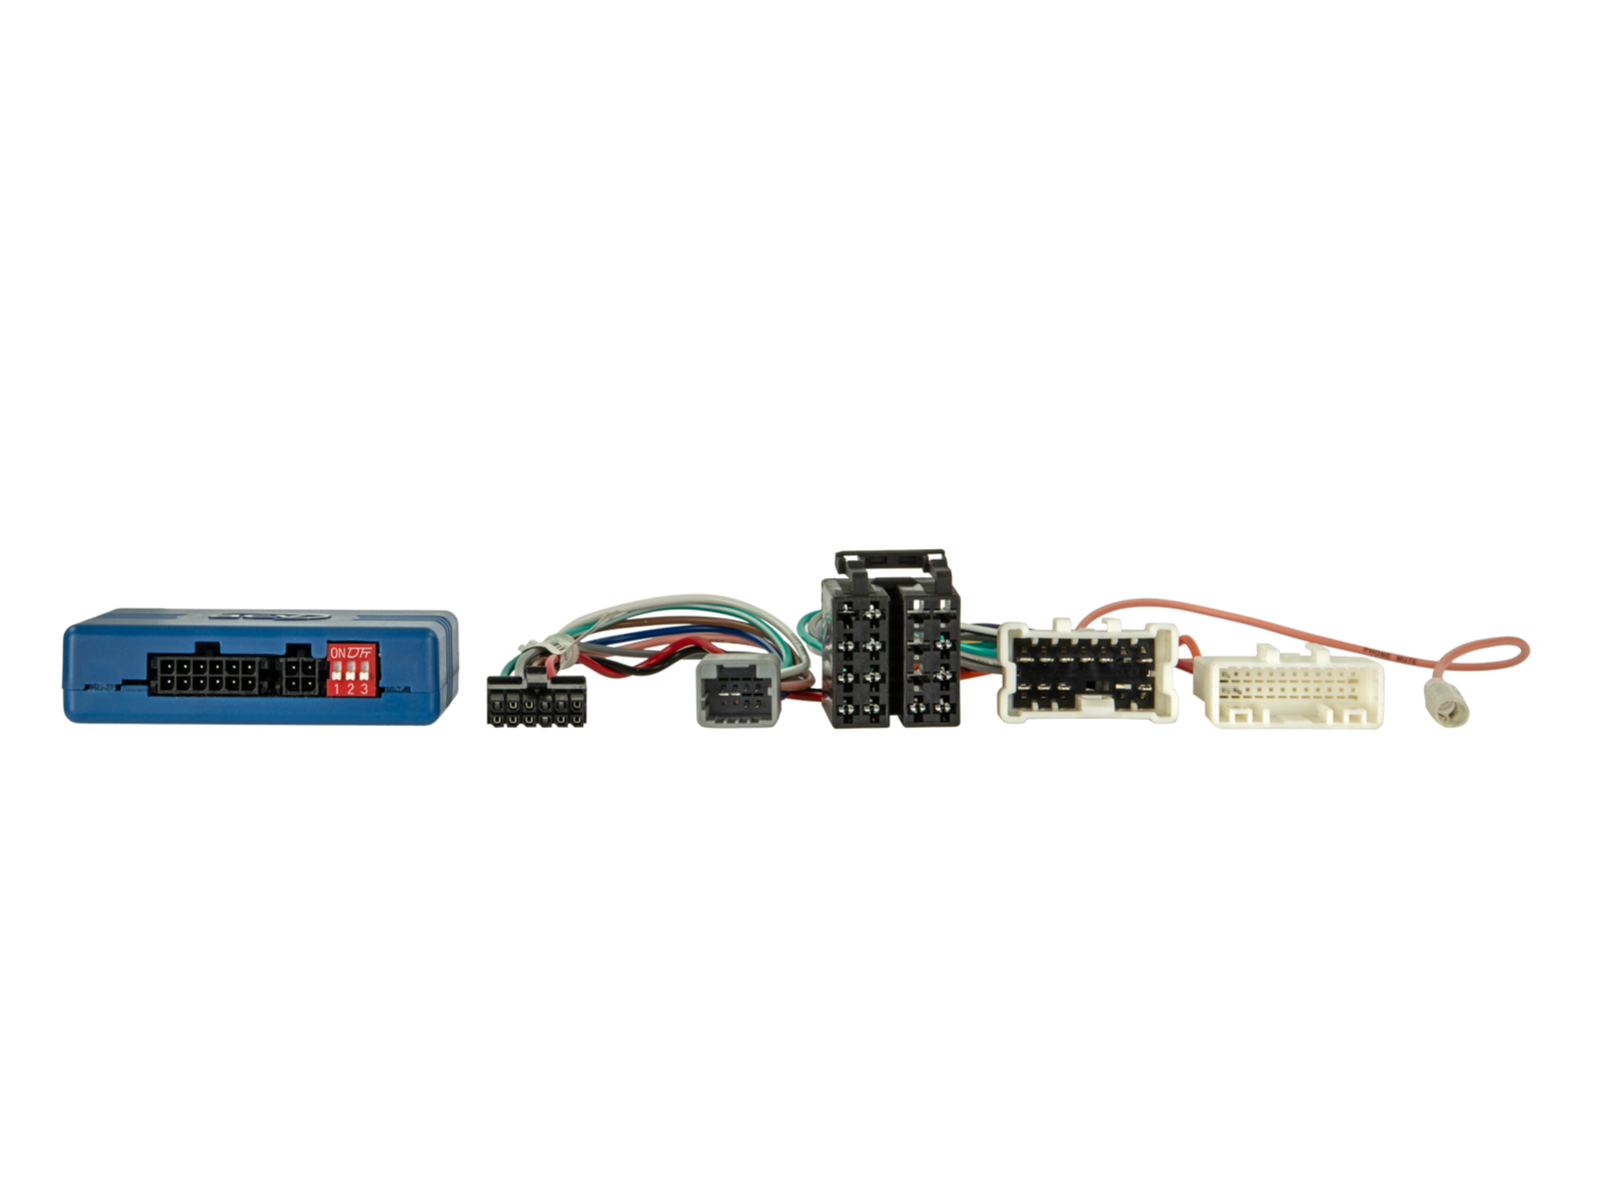
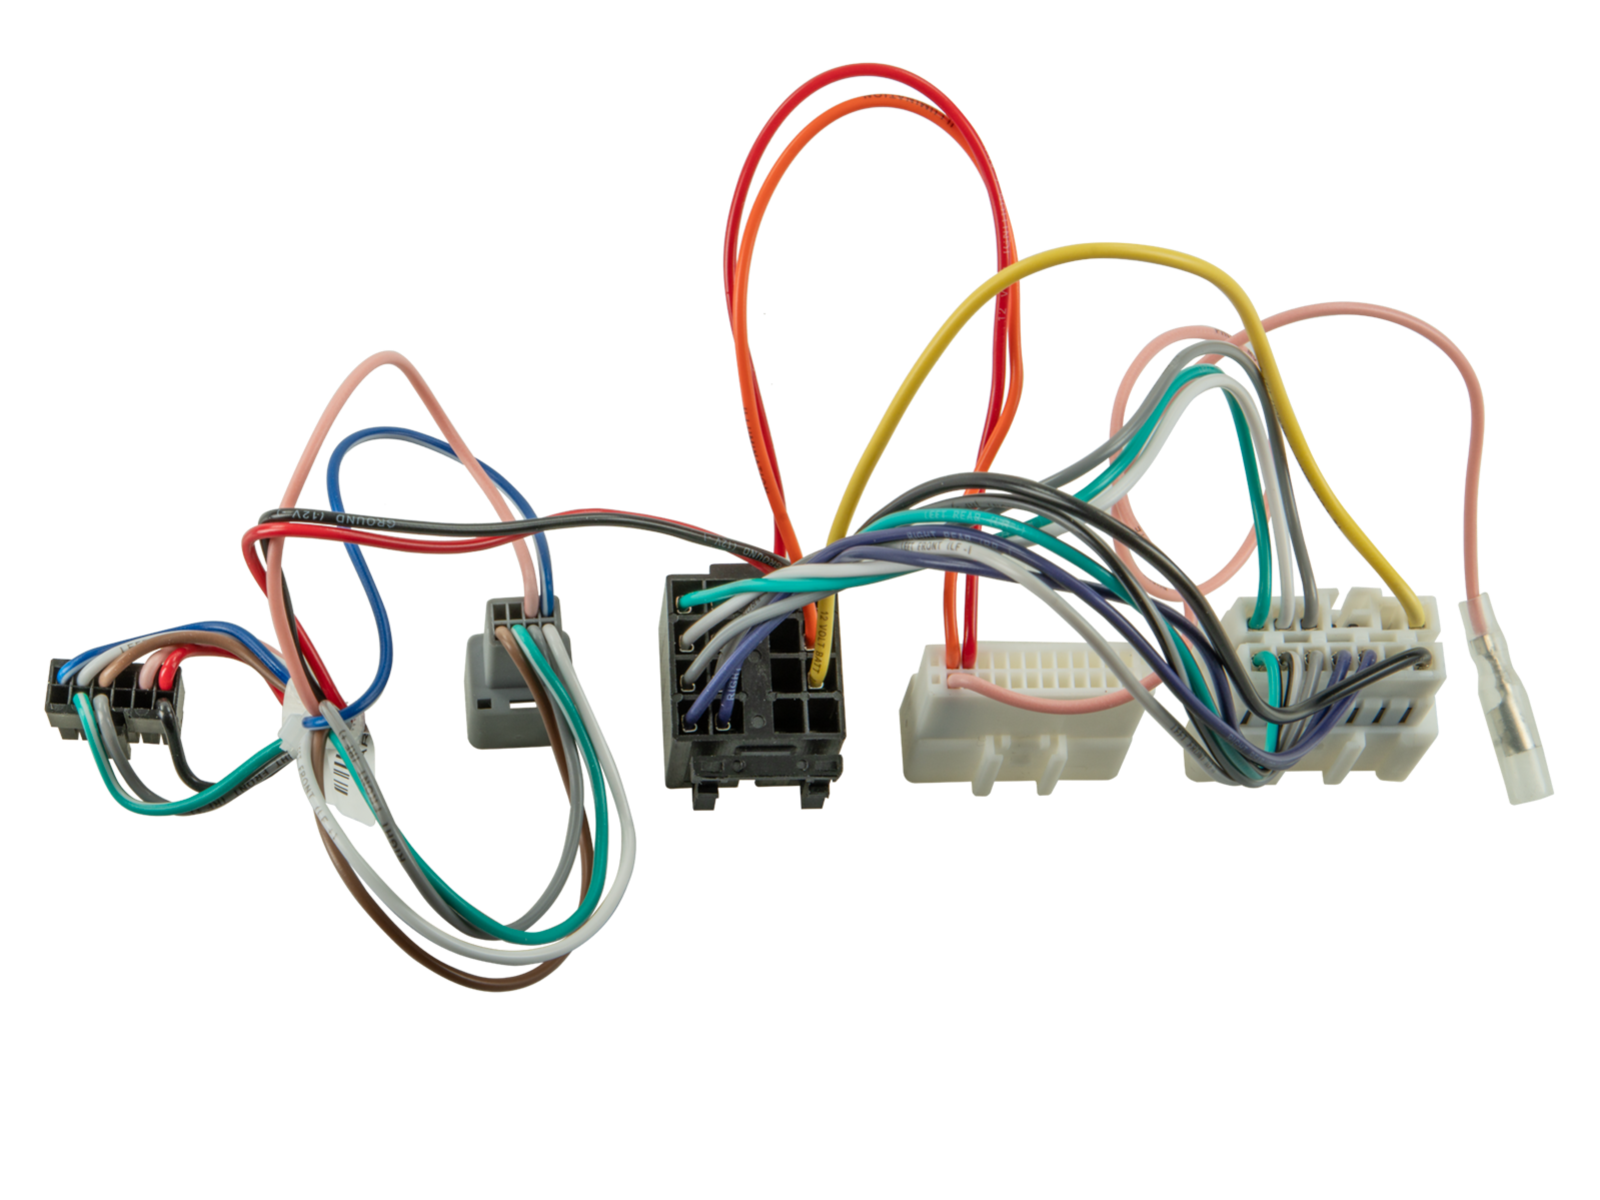
INTERFACE STER. KIEROWNICY SWC RENAULT..,DACIA..,MERCEDES..,NISSA..,OPEL... CTSRN009/42a-1254-009 ACV
210,57 PLN 259,00 PLN brutto| Kod | INTERFACEKRENAULTCTSRN009ACV |
| Kod EAN | 4026724528206 |
| Dostępność | Dostępny |
PLUS KABEL DO RADIA 42arc107
Fiat Talento (ZAF 296) 07/2016 -> 10/2021*
Mercedes
Mercedes Citan (W415) 10/2012 -> 12/2020
Nissan
Nissan NV300 (4/J4) 11/2016 -> 06/2019*
Nissan NV300 (4/J4) 06/2019 -> 09/2021*
Nissan NV300 (4/J4) 05/2021 -> 09-2021*
Nissan NV400 (M) 07/2014-> 07/2020
Nissan NV400 (M) 07/2020 -> 12/2021
Nissan Primastar (4/F4/J4) 01/2011 -> 05/2015*
Opel
Opel Movano B (X62) 10/2013 -> 09/2019**
Opel Movano B (X62) 10/2019 -> 08/2021**
Opel Vivaro B (X82) 06/2014 -> 01/2019**
Renault
Renault Captur (R) 06/2013 -> 03/2017*
Renault Captur (R) 03/2017 -> 12/2019
Renault Clio IV (X98) 11/2012 -> 06/2016**
Renault Clio IV (X98) 06/2016 -> 12/2020**
Renault Kangoo (W) 03/2013 -> 12/2020
Renault Master III (M) 09/2014 -> 08/2018*
Renault Master III Z.E. (M) 06/2018 -> 06/2020*
Renault Master III (M) 10/2019 -> 2023*
Renault Trafic III (J/JL) 09/2014 -> 07/2019*
Renault Trafic III (J/JL) 09/2019 -> 03/2022*
Renault Twingo (N) 01/2012 -> 07/2014***
Following signals are provided:
SWC
*vehicles with Media Nav / Media Nav Evo OEM Sat Nav
*vehicles with 1-DIN OEM HU black front with AUX/USB 2 x chrome rotary knob
**vehicles with Navi 50 Intellilink OEM Navigation with front AUX/USB / Media Nav OEM Sat Nav
**vehicles with 1-DIN OEM HU black with front AUX/USB 2 x chrome rotary knob
***vehicles with 1-DIN OEM HU black with front USB
***vehicles with 1-DIN OEM HU silver with front-USB > item: 42srn008
HU application:
SWC lead 42s/acv > Alpine Jack: 42ctalpinelead
SWC lead 42s/acv > Parrot 4 Pin: 42ctasteroidlead
SWC lead 42s/acv > Bosch-Blaupunkt >2010 Mini ISO: 42ctblaupunktlead
SWC lead 42s/acv > Blaupunkt/China HU/ Kenwood 3 wire: 42ctchinahulead
SWC lead 42s/acv > Clarion Jack: 42ctclarionlead
SWC lead 42s/acv > JVC 1 wire/Jack: 42ctjvclead
SWC lead 42s/acv > Kenwood 1 wire: 42ctkenwoodlead
SWC lead 42s/acv > Multilead different HU: 42ctmultilead
SWC lead 42s/acv > Multilead different HU/Pioneer 2022>: 42ctmultilead3
SWC lead 42s/acv > Multilead different HU/Pioneer 2022>: 42ctmultilead5
SWC lead 42s/acv > Panasonic 1 wire: 42ctpanasoniclead
SWC lead 42s/acv > Blaupunkt/Kenwood/Pioneer Jack: 42ctpioneerlead
SWC lead 42s/acv > Pioneer AVH/DMH/SPH 2022> Jack bulk: 42ctpioneerlead2
SWC lead 42s/acv > analog learning HU: 42ctsmartlead
SWC lead 42s/acv > Blaupunkt/Kenwood/Sony Jack: 42ctsonylead
SWC lead 42s/acv > XZent/Zenec 1 wire: 42ctzeneclead
General installation instructions:
Verification:
1: Check all operating functions and vehicle setting functions of the OEM HU.
2: Disconnect the OEM HU voltage-free.
3: Check all interface connections for correctness in a voltage-free.
Connection and connection sequence:
1: Check settings and hardware configuration of the interface voltage-free.
2: Check configuration of the radio connection cable voltage-free.
3: Connect the radio connection cable according to the operating instructions of the retrofit HU.
4: Connect all other connections according to the operating instructions of the retrofit HU.
5: Connect the entire installation to the vehicle with the main connection last.
6: Software configuration of the interface according to the instructions in the item text and in the manual.
7: Configure the retrofit device according to the operating instructions of the retrofit device steering wheel remote control/camera/FSE/antenna phantom powering and others.
8: Function test of steering wheel remote control and vehicle
Changes to the configuration of the interface and the radio connection cable:
1: Change configuration voltage-free
2: Reonnection see above 5 to 8
In case of malfunction of the interface or the vehicle:
1: Reinstall the OEM HU
2: Operate the OEM HU
3: Establish CAN bus shut down
4: Check the hardware configuration of the interface
5: Reconnection after CAN Bus shut down see above 5 and 6
More connections, connection changes, alternative connections, connections of loose cables or connection extensions of loose cables specified in the information text or the manual are for orientation purposes only and for the information of trained specialist instaler.
More connections, changes to the cable configuration of the wiring harness or use of alternative connections or connection extensions:
1: Connections and changes are to be carried out exclusively by trained specialist installer.
2: Connections and modifications must be checked before connection for any manufacturer approvals or manufacturer warranty conditions that may be affected by the modifications.
3: Connections and modifications must be checked for function and correctness by measuring and comparing them with the vehicle's cable assignment diagram before connection.
4: Connections and modifications are made on the user's own responsibility without guarantee of function.
5: Connections and modifications are made on the user's own responsibility without any guarantee of damage to the vehicle, the retrofit device or the interface.
6: Modifications to the pre-assembled wiring harness may invalidate the product's warranty.
Ogólne instrukcje instalacji:
Weryfikacja:
1: Sprawdź wszystkie funkcje operacyjne i funkcje ustawień pojazdu OEM HU.
2: Odłącz beznapięciowy HU OEM.
3: Sprawdź poprawność wszystkich połączeń interfejsu w trybie beznapięciowym.
Podłączenie i kolejność połączeń:
1: Sprawdź ustawienia i konfigurację sprzętową interfejsu beznapięciowego.
2: Sprawdź konfigurację kabla przyłączeniowego radia bez napięcia.
3: Podłączyć kabel połączeniowy radia zgodnie z instrukcją obsługi retrofit HU.
4: Podłączyć wszystkie pozostałe przyłącza zgodnie z instrukcją obsługi retrofit HU.
5: Podłączyć całą instalację do pojazdu głównym przyłączem jako ostatnim.
6: Konfiguracja oprogramowania interfejsu zgodnie z instrukcjami zawartymi w tekście punktu oraz w instrukcji.
7: Skonfiguruj urządzenie doposażające zgodnie z instrukcją obsługi pilota zdalnego sterowania na kierownicy/kamery/FSE/zasilania fantomowego anteny i innych.
8: Test działania pilota na kierownicy i pojazdu
Zmiany w konfiguracji interfejsu i kabla do podłączenia radia:
1: Zmień konfigurację bez napięcia
2: Ponowne podłączenie, patrz powyżej 5 do 8
W przypadku nieprawidłowego działania interfejsu lub pojazdu:
1: Zainstaluj ponownie OEM HU
2: Obsługuj OEM HU
3: Ustal zamknięcie magistrali CAN
4: Sprawdź konfigurację sprzętową interfejsu
5: Ponowne podłączenie po wyłączeniu magistrali CAN, patrz powyżej 5 i 6
Więcej połączeń, zmian połączeń, alternatywnych połączeń, połączeń luźnych kabli lub przedłużeń połączeń luźnych kabli podanych w tekście informacyjnym lub instrukcji służą wyłącznie celom orientacyjnym i informacjom przeszkolonego instalatora.
Więcej połączeń, zmiany w konfiguracji przewodów w wiązce przewodów lub zastosowanie alternatywnych połączeń lub przedłużeń połączeń:
1: Podłączenia i zmiany mogą wykonywać wyłącznie przeszkoleni instalatorzy.
2: Połączenia i modyfikacje należy sprawdzić przed podłączeniem pod kątem wszelkich zatwierdzeń producenta lub warunków gwarancji producenta, na które modyfikacje mogą mieć wpływ.
3: Przed podłączeniem należy sprawdzić połączenia i modyfikacje pod kątem działania i prawidłowości, dokonując pomiarów i porównując je ze schematem rozmieszczenia przewodów pojazdu.
4: Podłączenia i zmiany dokonywane są na własną odpowiedzialność użytkownika bez gwarancji działania.
5: Podłączenia i zmiany dokonywane są na własną odpowiedzialność użytkownika, bez gwarancji uszkodzenia pojazdu, urządzenia doposażenia lub interfejsu.
6: Modyfikacje wstępnie zmontowanej wiązki przewodów mogą unieważnić gwarancję produktu.
